In this post I am going to describe in simple steps how to create an entity (a table) using the Business Application Studio (BAS) and Cloud Application Programming (CAP).
Before I start with the practical part, I want to share some thoughts on a possible business case where it makes sense to use CAP.
For example, let us think of an application (FIORI Elements) that has the goal to store, monitor and analyse information related to a business object from the on Premise System, let's say a production plant. If the information we want to store is not related to production or logistics and not really needed in the BackEnd System, there is no good reason to store it on your on-Premise System.
That is why it is always a good idea to ask ourselves and our team where we need the data. Do we need a picture of your factory in SAP BackEnd? Probably no. Does our BackEnd System need to know if the lightning in the Plant is good? Probably no.
Our application can create Plant Management (PM) orders / notifications in the SAP BackEnd System only in the cases when somethings is not working, e.g. the lightning is out of order.
Is the information we are going to store on your Cloud DB sensitive? Does storing it on cloud violate the legal requirements of your company? If not, then you can consider saving it on the cloud. It is all about viewing the BPT and the on Premise System as one architecture and making the best choice.
The whole information and history of the stored data will be available on SAP BTP and we can create some analytical apps to monitor and evaluate it.
In the described case we would be are building an application that consumes (oData Services, probably some search helps) from your on Premise system and stores the data on the SAP HANA Cloud.
To make the example more interesting, we will consider a customizing table where we define what information is going to be stored. Let us imagine something like outdoor area, indoor are, lightening, etc. Those areas can be evaluated with stars and with pictures. This table will be controlling the behavious of our application and we will need it on the Business Technology Platform.
Please consider that this and all other business scenarios on this blog are fully invented by me!
Our first task is to create the customizing table and this is a quick and straightforward example.
In terms of CAP, the idea is to think of creating entities rather than creating tables.
So the entity managing our applicaion will look like this:
Area : String(10)
Picture Upload: Boolean
Evaluation Enabled: Boolean
PM Order Creation Enabled: Boolean
We also want to have some initial configuration like:
Area Picture Upload Evaluation Enabled PM Order Creation Enabled
Outdoor Area true true false
Lightning true true true
Let's have an overview of the prerequisites:
- You have created a dedicated subaccount or you have a trial account on the Business Technology Platform
- In your subaccount you have subscribed to the Business Application Studio
- In you subaccount you have created a space and an SAP HANA Cloud DB Instance is running
Let's go to the BTP and create the entity:
- If you haven't done so, now is the time to create and run your devspace of type Full Stack Cloud Application
- In our devspace, we open a 'New Terminal' and change to projects by using
- Then we create our projects by using the command
where plantapp where plantapp is the name of our project.
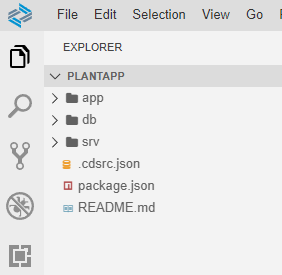
- As a result we get three empty folders: app, bd and srv which are empty. In other terms, we have got the persistence layer, the UI layer and the service layer.
- Now it is time to go ahead and create our entity. We go to db and create a file called schema of type CDS. The Type CDS is very important.
- By saving the entity, it gets actually deployed to sqlite
- The next step is to polulate our data. For this purpose we need to create a subfolder called data into our db folder. The name of the file is going to be the namespace / the name of the entity .csv
- Through this we have filled the entity with the data specified in the .csv File
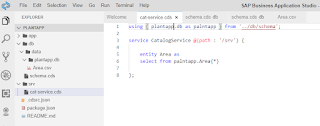
- Now we can create a catalogue service. We create a file, for example cat-Service.cds in the folder srv. We need just a few lines of code for our service:
- Time to test our Service
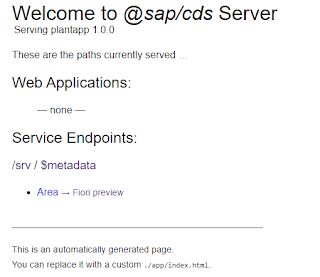
In the Terminal, type 'cds watch' and you will get the url of the oData Service Link.
When you klick it you will find the metadata of the service and even a ready fiori app where you can view your data.
- Let's have a look at the Fiori Preview
This is what our Data looks like in Fiori
Our Application is running with in memory sqlite database.
We can deploy it to the cloud foundry by using the two following commands
- cds add hana
- cds deploy --to hana (Sets an HDI Container)
For the creation of this post I have used this onboarding tutorial.


