Wednesday, April 14, 2021

SAP Data Connection for FIORI Apps: Catalogue Service Availability

 In order to develop different FIORI or freestyle UI5 applications, a list of settings should be made in the Business Technology Platform, in the Cloud Connector, as well as in the Back-End system.

Once the settings are made, the developers assigned to the subaccount can start creating FIORI applications.

This post describes the possible issues behind the error message 'Catalogue Service Unavailable'.

If the Data Connection doesn't function properly, the following error message appears:


You can also debug this this error message in your browser and check the Network tab.


  • Catalogue Service

The issue here is that the Catalogue Service is not active.

Check transaction SEGW and make sure that the services /IWFND/SG_MED_CATALOG and ADT are activated. 


As next, Go To Transaction SICF and make sure the nodes for the ADT and the Catalogue Service are activated.

  • Authorizations

If this doesn't solve the issue, you can check wether there are any authorization issues. Either run the authorization trace or check transaction su53 for the User in the destination.

  • Cloud Connector

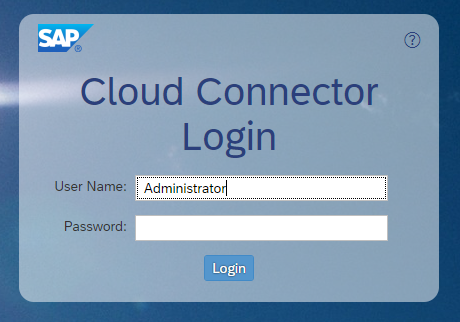
Further on, check your SAP Cloud Connector.


Go To Cloud-to-on Premise and make sure the resources are available.


Make sure that also that sub paths are available.


Wednesday, April 7, 2021

Creating a simple FIORI Elements Application based on an oData Service (no single line of code)

 This is a continuation of my previous post where I explained how to publish an oData Service from a CDS view.

In this post I will demonstrate how to create a FIORI Application which consumes this CDS View. This will be done in the Business Technology Platform, using the WEB IDE.


In the WEB IDE, go to select 'New Project from Template'.

Then, select the List Application.

Enter the basic information.

Provide the Data Connection and find the oData service. (See previous post).


Maintain the Template Customization.


The newly created Test WL Application will appear in your Workspace and you can test it.


It looks like this:


Monday, February 15, 2021

SAP CDS Views: Publishing an oData Service from a CDS View and Testing it (10 Simple Steps)

 In this post I am going to use the example from my previous post and publish it as an oData service in ten simple steps:

1. In the annotation part of the DDL, declare the publisher as 'true'


2. Make sure that the CDS View has at least one key field


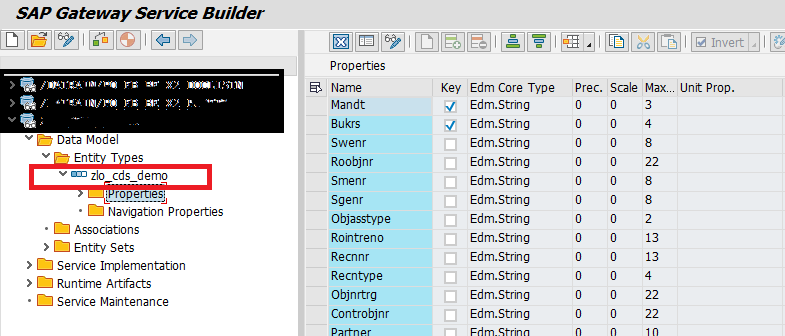
3. Go to transaction SEGW and create a new project


4. Import the Structure of the CDS View to the new project


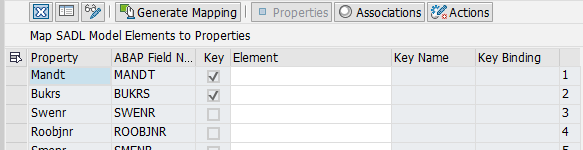
5. Map to the Data Source
6. Generate Mapping & Activate


7. Go to the Transaction /IWFND/MAINT_SERVICE 'Activate and Maintain Services' -> Add Service


Here select the System Alias and search for the Service with the name of the oData project

8. Load the Metadata and go to the Test Client


9. Coose an Entity Set you want to test.
In our example we have only one entity set.

10. Test your service


Wednesday, February 10, 2021

SAP CDS Views: Creating a CDS View with an Authorization Check

In this post I am going to demonstrate the creation of a CDS view with an authorization check. Implementing  authorization checks hand in hand with the CDS view is a great way to achieve even more code pushdown.

The example in this post is from the RE-FX module but it can be applied in every module.

I am going to redesign a common report in the real estate, for example the occupation and pull some contract and partner data.

The Data Definition Language (DDL) part looks like this:


In the annotation part it is very important to activate the authorization check.

The authorization check will be executed for the company code (BUKRS).

For this purpose we need to define an access control, the so called Data Control Language (DCL) part.


Usually, we want to integrate the standard SAP authorization checks as they are defined in PFCG.
For the company code we would refer to the dedicated authorization object F_BKPF_BUK.

The DCL grants access to the previously defined DDL zlo_demo. 

The user can see only the company codes for which they are authorized through the authorization object F_BKPF_BUK.


Monday, December 28, 2020

SAP: How To Link Sent E-Mails to Business Objects

The so called 'Services for Object' are available for many central SAP objects, such as Purchase Orders, PM Notifications, Entry Sheets, etc. 


This post will focus on the function 'Services for Object -> Send -> Object Outbox'. 

The Object Outbox contains the E-Mails sent through the function 'Send object with note'.


The Object Outbox function displays the sent E-Mail as it is in the SOST transaction.

It is also possible to link E-Mails as services for the Business from customer specific business process and even from the message processing.

This post will discuss different ways of creating E-Mail Links depending on how the E-Mail is sent from the business process.

E-Mails sent through the function module 'SO_DOCUMENT_SEND_API1'

The approach of sending E-Mails through the function module 'SO_DOCUMENT_SEND_API1'  is obsolete but in case of enhancing an existing solution, there is a following way of linking the E-Mail from the business object:

We need to import the NEW_OBJECT_ID in our code. 


Throgh the method   get_bcs_obj_from_bci_key of the class cl_crm_email_utility_base we can retrieve the send request.

  CALL METHOD cl_crm_email_utility_base=>get_bcs_obj_from_bci_key
    EXPORTING
      is_bci_key          = lv_new_object_id
    IMPORTING
      ev_send_request_bcs = data(lo_sendrequest).

Afterwards we can link the send request to the Business Object. 

lo_sendrequest->create_link( ls_borident ).

It is important to note that in this scenario we already have created the E-Mail send request and we create the Link to the Business Repository Object (BOR) in the next step.

The BORIDENT Structure is represented by the Object Type and the Object Key.
To make sure you have the right business object, you can refer to transaction SWO1. 

Example for entry sheets: Object Type BUS2091, object key is the fiels LBLINI from the table ESSR.

E-Mails sent through the Business Communication Service Class CL_BCS

The difference from the previous approach is that we link the E-Mail and the business object before the E-Mail was sent.

The BOR Object is linked to the request in the second step

* 1.Create persistent send request
      lx_send_request = cl_bcs=>create_persistent( ).

* 2.Create Link between the Send Request and the BOR 
          CALL METHOD lx_send_request->create_link
            EXPORTING
              i_appl_object = ls_borident
* 3.Send document
      CALL METHOD lx_send_request->send( ).


This is a very simple, clean code approach and recommended for new implementations or for enhancing functions that already use the Business Communication Service Class.

E-Mails that have already been sent from an Output Type as External Send

The NAST Table contains the E-Mail titles in the field TDCOVTITLE. 
Through the Title, you can find the SOOD record of the sent E-Mail.

The BOR Object and objekt key are also contained in the NAST Table (OBJTYPE, OBJKY), which makes it easy to link the mail.

Configuring  E-Mail Linking from Output Type 

Output types customized in the NACE transaction often send E-Mails, for example to customers or vendors. If the medium '5 - External Send' is used, the SAP Standard Logic (the parent program RSNASTSO) sends the mail through the function SO_OBJECT_SEND. 
Linking the E-Mail to the BOR Object is not easily possible.

If you use the medium '8 - Special Funktion', you can use the CL_BCS class.


Monday, July 6, 2020

SAP EHS: How to select Dangerous Goods Data for Sales&Distribution Printouts

Depending on the setup of your ERP System  and the regional requirements, orders, deliveries and shipments in the Sales&Distribution module produce different kinds of printouts (delivery notes, shipment lists, bills of lading, etc. ).

Usually, those printouts contain Dangerous Goods Data, which is relevant for transport.
If the prinouts use the standard DG Data retrieval logic and your system has a standard DG Data maintenance & customizing, there is nothing to worry about.
The standard logic takes the material and the route from the SD document and determines the DG regulation for which the DG Data is retrieved.

These checks are specified in the customizing activity 'Assign DG Check Schema Determination Routines' per Sales Organisation.

There you can check which check schema is assigned.

You can check your printing settings in transaction NACE.


However, if the prinouts use customer specific data retrieval, z-logic, direct selects on the DGTMD and DGTM2 tables for every printout, then you might opt for a central, reusable solution to include in your retrieval code for all printouts.

The central function can use following logic available in standard function modules.

In this post I will focus on the deliveries:


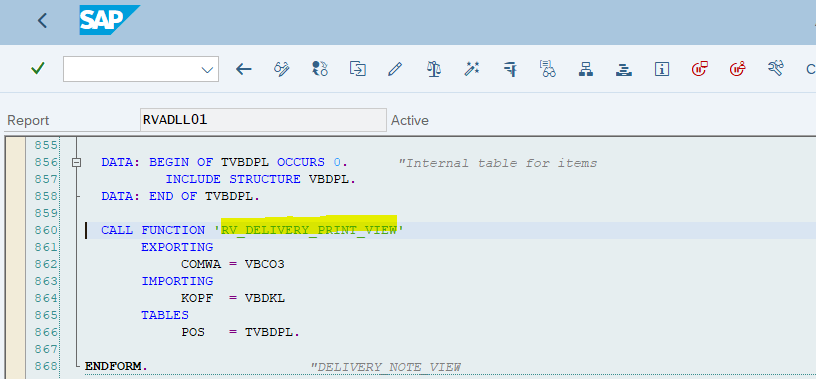
  • Read the delivery item data using 'RV_DELIVERY_PRINT_VIEW'. Maybe this step is already there in the data retrieval logic.


  •  CALL FUNCTION 'DG56_GET_TRM_CNTRIES_DELV'
          EXPORTING
            e_vbdkl                 = <s_vbdkl>
            i_nspras                = iv_nspras
          TABLES
            e_tvbdpl                = it_vbdpl
            e_rdgcountryreglang_tab = lt_rdgcountryreglang
          EXCEPTIONS
            get_data_error          = 1
            OTHERS                  = 2.
        APPEND LINES OF lt_rdgcountryreglang TO lt_rdgcountryreglang_all.


      LOOP AT lt_rdgcountryreglang_all ASSIGNING <s_rdgcountryreglang>.
        CLEAR ls_rdgmdsel.
        ls_rdgmdsel-matnr  = <s_rdgcountryreglang>-matnr.
        ls_rdgmdsel-lwdg   = <s_rdgcountryreglang>-lwdg.
        ls_rdgmdsel-valdat = sy-datum.
        APPEND ls_rdgmdsel TO lt_rdgmdsel.
      ENDLOOP.


  •       CALL FUNCTION 'HAZMAT_RECORD_READ_FROM_DB'
        EXPORTING
          i_flg_read_undeleted_only  = abap_true
        TABLES
          i_rdgmdsel_tab             = lt_rdgmdsel
          e_buftab                   = lt_rdgma
        EXCEPTIONS
          no_records_found           = 1
          no_records_for_all_entries = 2
          OTHERS                     = 3.


The same can be done for shipments using the standard module 'DG56_GET_TRM_CNTRIES_SHIP'
 or for orders.

The return structure RDGMA contains all print-relevant fields from the DGTMD and DGTM2 tables.

We can  easily and simply read the DG Data using standard functions according to the system customizing without writing any direct  select statements on DGTMD / DGTM2 tables.

This approach makes sure that you are selecting the correct DG Data for the SD Document.

For more information about DG Data, please check my
previos post.


Wednesday, June 24, 2020

SAP ABAP: Object Oriented Design for Reports

In this post I would like to demonstrate the possibilty to use Object Oriented Code in a classic report.

I often face pseudo object orieted code in ABAP reports (classes containing only statis methods that serve as wrappers for procedural code, performs wrapped in methods).

That is why I would like demonstrate a simple and flexible OO solution, using local classes.


REPORT zxyz.
TABLES: estvh, estva, estrh.


SELECTION-SCREEN : BEGIN OF SCREEN 900.
SELECT-OPTIONS: s_estcat FOR estvh-estcat DEFAULT 'SAP_EHS_XYZ'.
SELECT-OPTIONS: s_subid FOR estrh-subid.
SELECTION-SCREEN : END OF SCREEN 900.


*--------------------------------
*CLASS lcl_main DEFINITION
*--------------------------------
CLASS lcl_main DEFINITION.
  PUBLIC SECTION.
    CLASS-METHODS :start_report.

  PRIVATE SECTION.
    METHODS : fetch,
              check_auth,
              display.
    CLASS-DATA : lr_main TYPE REF TO lcl_main.
    DATA it_table TYPE TABLE OF zasi_cds_count_inst.
ENDCLASS.                   
*------------------------------------
*       CLASS lcl_main IMPLEMENTATION
*-------------------------------------
CLASS lcl_main IMPLEMENTATION.
  METHOD start_report.
BREAK-POINT.
    CALL SELECTION-SCREEN 900.
    IF sy-subrc IS INITIAL.

      CREATE OBJECT lr_main.
      lr_main->fetch( ).
      lr_main->display( ).
    ENDIF.

  ENDMETHOD.                   
  METHOD fetch.
SELECT * INTO TABLE @it_table FROM zasi_cds_count_inst WHERE subid IN @s_subid AND estcat IN @s_estcat.
  ENDMETHOD.                    
  METHOD check_auth.
-->>perform authorization checks here
  ENDMETHOD.
  METHOD display.
    DATA : lr_table TYPE REF TO cl_salv_table.
    cl_salv_table=>factory(  IMPORTING    r_salv_table   = lr_table
    CHANGING     t_table        =   me->it_table  )    .
    lr_table->display( ).
  ENDMETHOD.                    
ENDCLASS.  


START-OF-SELECTION.

  lcl_main=>start_report( ).


This solution provides more control and more flexibility compared to the procedural approach over events.

The selection screen is defined with a dedicated number and called later at start_report.
This allows flexibilty. We can define more selection screens and call the one we need based on authorization checks, for example. 

This approach might seem strange for those of us who are used to the START-OF-SELECTION, PERFORM xyz, END-OF-SELECTION type of programming but it is worth trying.